

green manuare
Basic 4-Bed Vegetable Garden Layout
Keep beds no wider than about 4ft (1.2m), because this is a good width for most people to easily reach the middle of the bed without having to step on the soil. Make paths between beds wide enough for easy access, including with a wheelbarrow – an essential consideration when moving compost about.
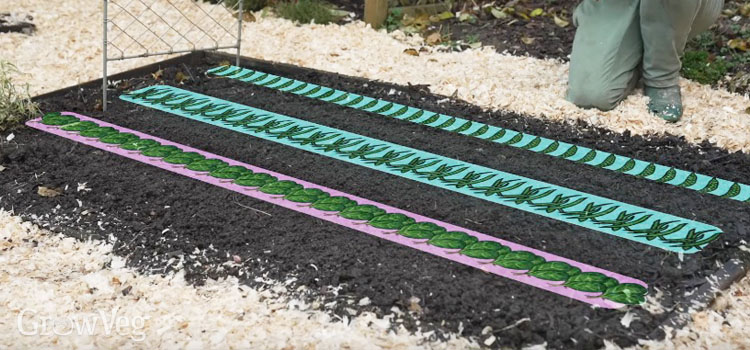
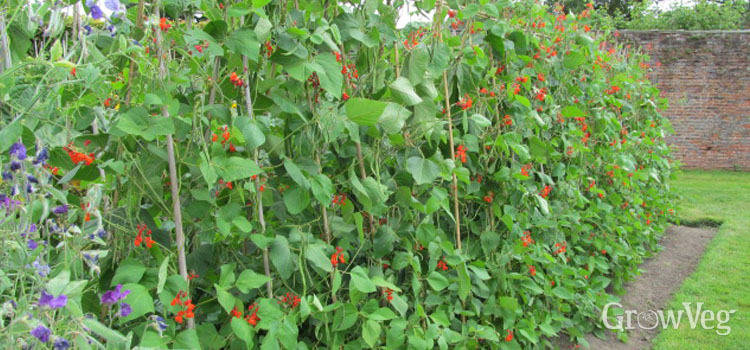
1. Beans and Peas
The first bed is for beans and peas. Why? Because these are some of the most productive plants you can grow, so it’s well worth prioritizing them! Locate these climbers towards the back of the bed, furthest away from the sun, so they won’t overshadow shorter plants in front. To help support them, a double row of canes, linked and supported with a ridge pole at the top, works beautifully. Peas and beans need regular picking to keep their protein-packed pods coming.
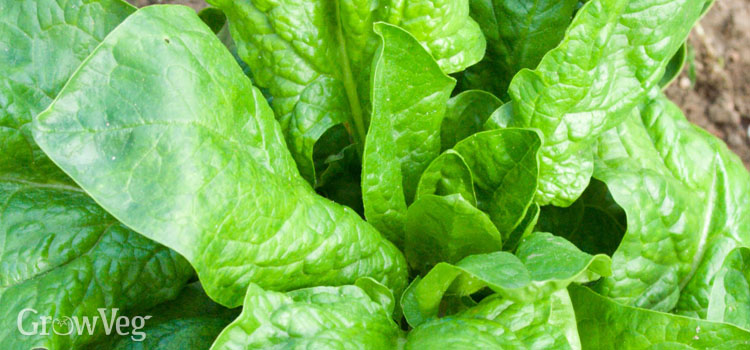
In front of the peas and beans you might grow a row of iron-rich spinach – one of my favorite greens. Spinach is best grown during the cooler months of the year, avoiding midsummer. My climate isn’t too hot in summer, but if yours is you could shunt the beans forward in the bed then place your spinach behind them to benefit from the shade they cast.
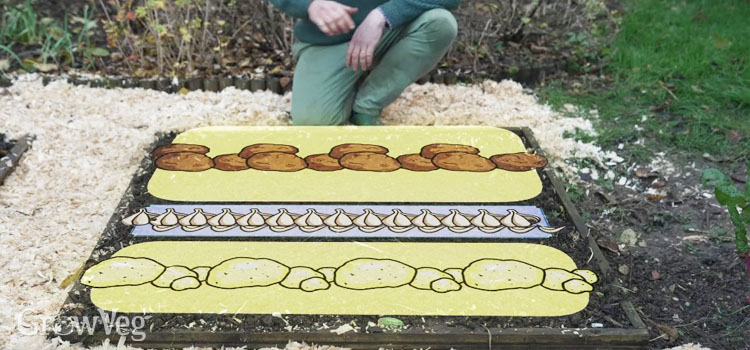
2. Potatoes and Garlic
In the next bed, plan to grow potatoes. You might like to allocate one row for early salad potatoes and a second row for maincrop potatoes, which will mature later in the summer for storing into the cooler months of the year.
Potatoes are generally trouble free so long as you keep them well watered during dry weather. But to help them along still further, include a row of garlic between them. Garlic is excellent at repelling aphids, including potato aphid and green peach aphid, which can both attack potatoes, so it makes sense to include them here.
This is what I love about planning nice and early – it gives me time to carefully think out each and every crop combination to maximize the benefits between plants – what we call ‘companion planting’.
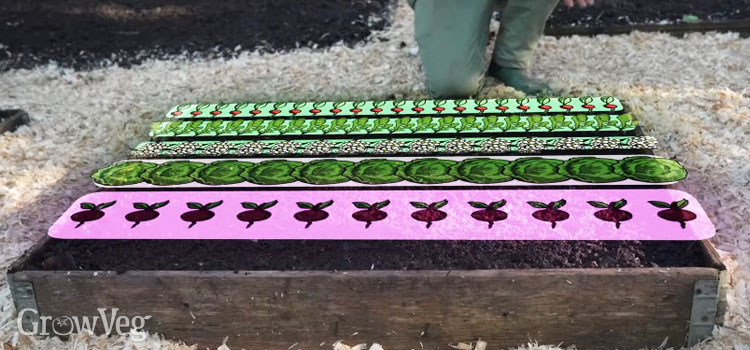
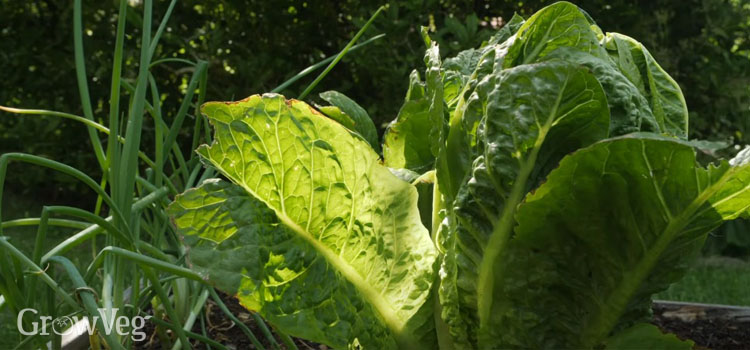
3. Salads
The third bed is dedicated to salads, with crops like radish, lettuce, arugula, and beets. These will all grow to about the same height, so there’s no worries about any of them shading each other out.
I’d also include a frothy row of sweet alyssum here. Alyssum is one of those vegetable garden flowers that works really hard for the space it occupies. The flowers are hugely attractive to tiny wasps and other pest predators which will munch up aphids, something that lettuces can be prone to. I always include alyssum in my vegetable garden for this reason, and it really does seem to result in far fewer pests. And it flowers for months on end too!
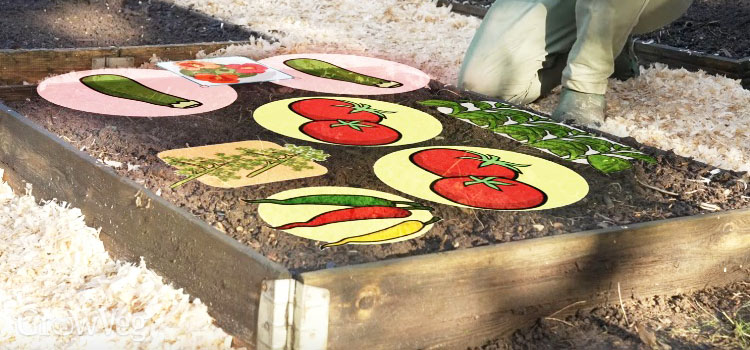
4. Warmth-Loving Crops
The final bed is a warm-season bed, full of sun seekers, bursting with flavor. Zucchini is really worth including – like beans, they never fail to pump out lots and lots of fruits, so long as you keep on picking of course!
And what garden wouldn’t be complete without some tomatoes? Blight is a common disease of tomatoes, so it often pays to choose a blight-resistant variety to avoid any problems. Include some hard-working companion plants for good measure: parsley, for attracting pest predators when left to flower, and basil, which is a natural companion to tomatoes both in the garden and in the kitchen.
You could include a few chili pepper plants, and some nasturtiums too. Nasturtiums are fabulous flowers that sprawl here, there, and everywhere, helping to shade the soil while adding a splash of color. All parts are of it are edible, and I love the flowers as a finishing flourish to a garden salad.
If you’re starting a garden for the first time, don’t forget that different vegetables need to be sown at different times, depending on your climate. Several of the plants in the salad bed can be started quite early in spring, whereas the zucchini will need to be sown much later.
Sun and Shade
Sunlight is directly proportional to growth – more sunshine means faster results and healthier plants – so allocate the sunniest part of your garden for growing vegetables and fruits. You’ll get stronger growth and, as a rule, better-tasting produce, especially from fruiting crops like tomatoes. Of course, there are some crops that will cope with a little shade, including many leafy greens.
If you suffer from exceptionally hot summers you may want to seek out an area that gets some shade during the hottest time of day, or where you can grow taller heat-tolerant plants to cast a little shade over low-growing leafy crops that might appreciate it. Even in cooler climates, some plants do better with a little shade. Crops like lettuce are prone to bolting (running to seed) if they dry out, but some light shade can keep the soil cooler and moister, and help plants to remain productive for longer.

Shelter From Wind
Shelter from prevailing winds will prevent plants from getting buffeted about, but if your garden doesn’t have much natural shelter you can always create some. Hedges make great windbreaks, but will take a little time to grow large and dense enough to protect other plants. While they establish you can create temporary windbreaks with netting screens or fast-growing taller vegetables like Jerusalem artichokes (a.k.a. sunchokes).
Shelter’s great, but try to avoid areas with lots of overhanging branches or searching tree roots that might cast shade or compete for precious resources down at ground level. If there is a small downside to my garden it’s that it’s gradually getting more shaded as surrounding trees grow, so some light winter pruning may be needed just to push things back again and let more light in.
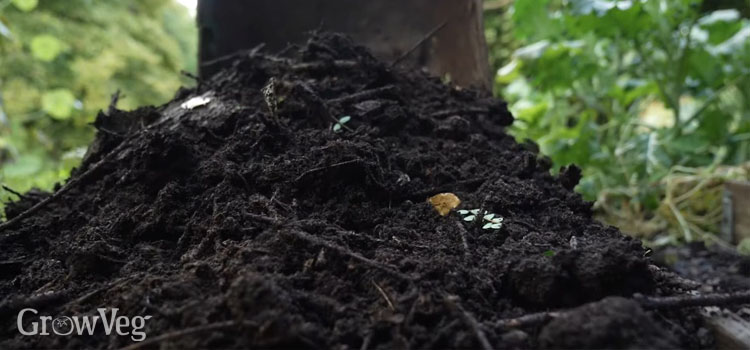
Soil Requirements
Soil is where everything starts! The best soil is free draining, yet able to hold onto enough moisture to keep plants happy between rain showers. Few of us have perfect soil, but whether yours is very sandy so dries out very quickly, or sticky clay that’s prone to winter waterlogging and baking hard in summer, the solution is the same: add lots of lovely organic matter such as compost or well-rotted manure to improve your soil over time. It can just be laid on the soil surface as a mulch – no need to dig it in. The worms and other soil organisms will incorporate it for you.
My garden gets insanely wet during the cooler months of the year – there’s a spring that can turn the soil surface to a slippery shimmer when it’s been raining for more than a few days. I’ve found the simple solution for this is to grow in raised beds, which helps with drainage during wet winters.
I placed my beds directly onto what was lawn. They were dug into the slope to ensure a level planting surface (which makes watering more effective because the water doesn’t just immediately run off downhill), and filled with a combination of composts.
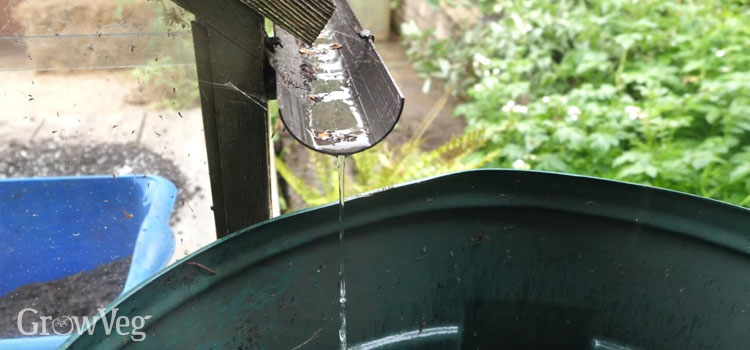
Watering
Plants need extra water in dry weather, and watering will help seedlings and young plants to establish. If you can, locate your garden close to a water source. Mine is at the front of my house, away from the garden. That’s not ideal, but I’ve got around this by using a long, extendable hose to reach around to the back where the garden is.
Treated mains water works, but saved rainwater is even better and should be actively prioritized, so plan to include some water barrels – the more the merrier! Harvest water from gutters attached to your house, shed, greenhouse – anywhere with a surface that can collect plenty of the wet stuff.
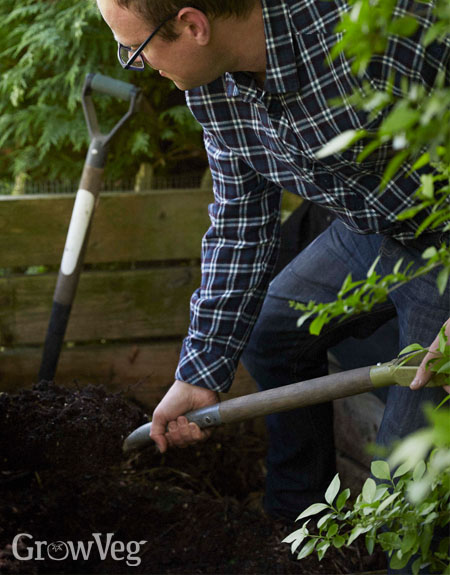
Composting
Gardens produce lots of organic material over the course of the year - weeds, spent crops, prunings etc – and almost all of this can be recycled back into the garden to feed future crops for free.
In a small garden, a composting setup might consist of a single lidded composter, while in larger spaces a series of compost bays can be the solution. Whatever your situation, don’t let any organic matter leave your garden – compost it!
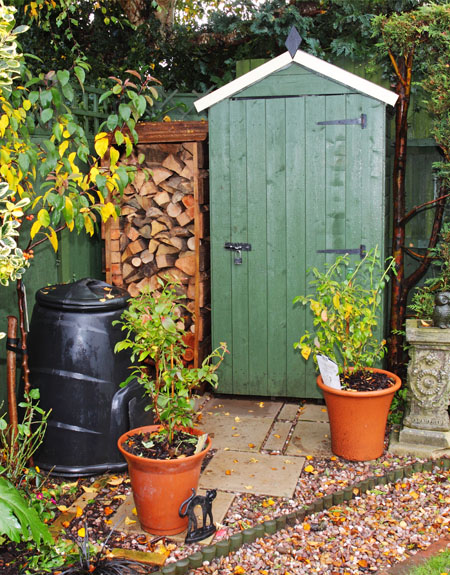
Tool Storage
Storage is essential for keeping tools and equipment dry and secure. I try to keep everything as convenient as possible so I can just grab what I need for each gardening session to save time. Even if you don’t have space for a shed, it’s worth making room for a simple garden store, or perhaps a bench with built-in storage for your most-used tools, pots, and other bits and bobs.
The Easy Way to Plan Your Vegetable Garden Layout
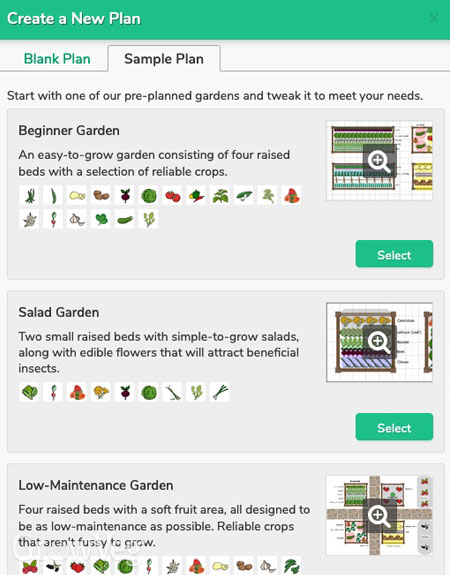
If you’d like to replicate my plan for these four beds, or just play around with it to suit your space, then head on over to our Garden Planner where you can find this Beginner Garden plan along with a selection of other sample plans. Click on New Plan then click the Sample Plans tab to find them.
If you don’t like some of the vegetables I’ve mentioned, no problem – just swap them out for your favorites, drag them into a row or block, and the Garden Planner will space them correctly and show how many you can fit in each area. Most importantly, it will then build a personalized Plant List showing exactly when to sow your chosen seeds and transplant them into your garden, and it will even email you planting reminders to keep you on track. How fab is that!?
You can try out the Garden Planner completely free, and there’s no need to put in any payment details. Find out more here.
Plants Related to this Article
Beans (Pole) Grow Guide

Peas Grow Guide
Spinach Grow Guide
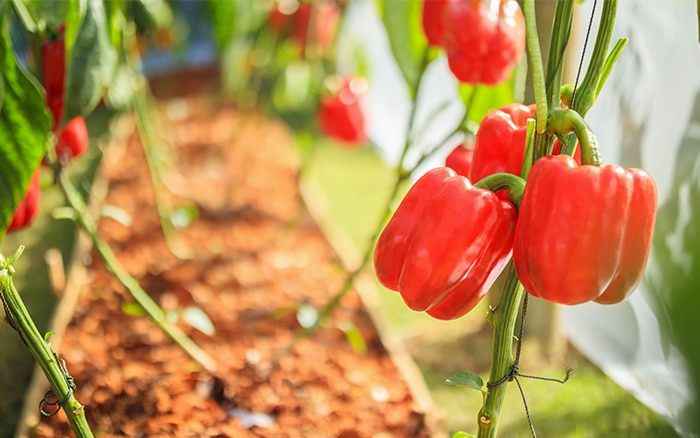
POWERFUL PEPPERS
Bell peppers are found in red, yellow, orange and green, all at different stages of their ripening. Green peppers are unripe and have a more bitter taste and aren’t as sweet as the other colours.
Vibrant and delicious, one medium red pepper provides a whopping 169% of the reference daily intake of vitamin C, making it one of the best dietary sources of this crucial nutrient.

By getting peppers in your diet, you’ll be well on your way to harnessing super-sight as they include carotenoids called lutein and zeaxanthin which have a positive impact on eye health. They do this by protecting your retina, which is the thin layer of tissue at the back inside your eye. This then communicates to the brain to help translate what we see. So, it’s got a hugely important job. You can protect it by ensuring you eat plenty of veg containing vitamins A and C.
DID YOU KNOW?
In terms of nutritional content red peppers blow green peppers out of the water. Red peppers have 11 times more beta-carotene, 10 times more vitamin A and twice as much vitamin C than green peppers. So, you’re sure to get your fix of vitamins from these sweet treats.
GROW YOUR OWN
You can have access to your own harvest of bell peppers. They will grow well in a greenhouse or outside they will need a sunny spot. Here’s how to grow your own:
1. From mid-February to early April, you can sow seeds indoors in trays, you’ll need to have them in a sunny spot where the temperature is about 18-21˚C.
2. Containers or growbags can be used to grow peppers, or the open ground if it’s sunny and sheltered enough.
3. When two leaves have formed, plants can be transplanted into pots.
4. Once the roots are outgrowing this pot, they can be transferred to a bigger pot in April or May.
5. If lots of heavy fruit is being produced, you may want to tie to plants to a stake to keep them upright.
6. Pick the fruit when it’s green and swollen which will encourage more to grow. You can leave it on the plant until it turns red, but it will reduce produce.
/www.youtube.com/embed/Z1YlA1TEkb0" title="YouTube video player" frameborder="0" allow="accelerometer; autoplay; clipboard-write; encrypted-media; gyroscope; picture-in-picture; web-share" allowfullscreen>
https://www.almanac.com/over-20-vegetable-garden-layout-ideas?trk_msg=330JPRLSO4J4JB6JJL2VIBT2J4&trk_contact=JP4RQ30B575IF0D61COMK94NOO&trk_module=new&trk_sid=R83
https://www.almanac.com/vegetable-gardening-for-beginners
TTomatoes Hate Cucumbers: Secrets Of Companion Planting and Popular Planting Combinationsext Box

Tomatoes Hate Cucumbers: Secrets Of Companion Planting and Popular Planting Combinations
- Posted by Kim,Usdi Tsayoga♥Owner on March 3, 2022 at 9:21am in Native Gardening
- Back to Native Gardening Discussions
Most people plant their gardens with little thought as to what plants grow well together. The secret to an amazing garden, though? Companion planting!
Companion
planting not only takes nutrient uptake into consideration, but it also
brings into account crop protection, pest management and positive
hosting (aka. increasing the population of beneficial insects that will
help manage your harmful pest population).
What is Companion Planting?
Companion planting is the practice of planting two or more plants together for mutual benefit. For example, certain plants might be grown together to help each other meet their nutrient requirements, growth habits, or pest-repelling abilities.
A classic example of companion planting comes from the Three Sisters trio – maize, climbing beans, and winter squash – which were often planted together by various indigenous nations across North America.
Benefits of Companion Planting
Aside from making nutrients available to other plants (and thus making them taste better), companion planting also achieves the following:
1. Minimizes Risk
If one crop fails or is affected by harsh weather, pests or disease, the overall yield of your plot may be increased by limiting the spread. To minimize risk, you’ll want to focus on creating the best natural growth patterns and diversity in your space. Avoid large monocultures (for example, a giant plot of tomatoes in one section), and instead focus on polycultures that mimick the way plants would grow in nature.
2. Crop Protection
Companion planting can offer shelter from harsh weather (like lots of wind or too much sun) to more delicate plants. Growing delicate plants next to more heartier ones that have the foliage and strength to withstand such conditions will guarantee the growth success of your smaller plants.
3. Trap Cropping
Companion planting also offers the best organic pest management. If one crop is more susceptible to pest infestation, try planting beneficial plants next to that crop that the pests despise. This will assist in protecting the pest-vulnerable plants.
4. Positive Hosting
By planting your fruit and veggies next to plants (like certain flowers) that produce a surplus of nectar and pollen, you can increase the population of beneficial insects while helping you manage your harmful pest population.
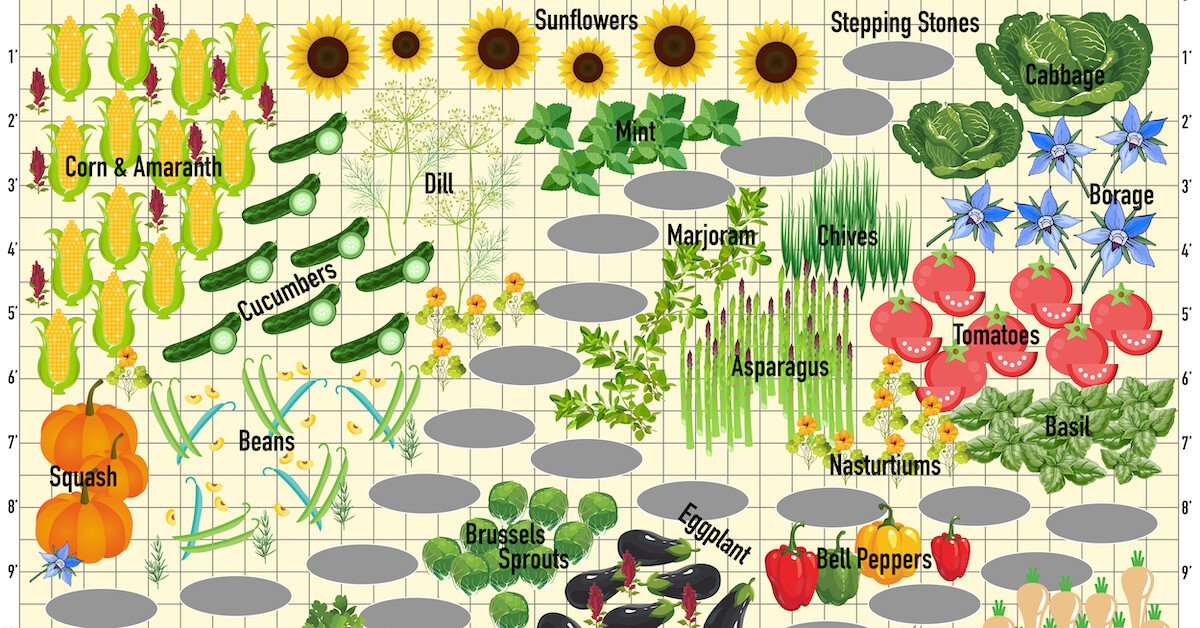
Companion Planting Chart
Use this companion planting chart as a guide so that you can design your garden in order to have better success!
Amaranth should be planted with corn to shade the soil and retain water. It also helps attract predatory ground beetles.
Asparagus can be planted with basil, cilantro, dill, marigolds, nasturtiums, oregano, parsley, peppers, sage, thyme and tomatoes. Asparagus actually repels nematodes that attack tomato plants, and tomatoes repel asparagus beetles.
Apples and Apricots surprisingly love to be planted next to garlic, but it makes sense. Garlic helps repel pests like the fruit tree bore, aphids and mites. The tree roots also absorb sulfur produced by the garlic, making the tree more resistant to fungus, mold and black spot. Marigolds are another winner for fruit trees, as they help attract pollinators (which then pollinate the flowers of the fruit trees). These flowers also help discourage nematodes in the soil, which beneficial for fruit trees.
Basil is a great herb to plant next to tomatoes to help improve their flavor. It also helps repel aphids, asparagus beetles, mites, flies, mosquitoes and tomato horn worm. For this reason, it should also be planted next to asparagus. Basil also works good when planted next to oregano and peppers.
Beans are all nitrogen fixers of the soil, so they should be planted next to plants of the Brassica family, carrots, celery, chard, corn, cucumber, eggplant, peas, potatoes, radish and strawberries. Avoid planting near chives, garlic, leeks and onion (they don’t like them!). Beets and beans should also be avoided next to one another as they can stunt each others growth.
Beets can be planted next to bush beans, Brassicas, corn, garlic, kohlrabi, leeks, lettuce, mint and potatoes. Avoid planting beets next to pole beans.
Borage is a wonderful flower and companion too many plants. It deters tomato hornworm and cabbage moth caterpillars – so make sure you plant them next to tomatoes and cabbages! Borage also attracts pollinators, so plant it around plants that need pollinating like squash, melons, and cucumbers. It is also great for the soil and compost.
Bok Choy may experience improved growth and health if it is planted alongside beets, bush beans, carrots, chamomile, chard, cucumbers, dill, kale, lettuce mint, nasturtiums, potatoes, sage and spinach.
Brassicas like broccoli, brussels sprouts, cabbage, cauliflower, collards, kale, kohlrabi and turnip all benefit from chamomile, cilantro, dill, mint, rosemary and sage. Broccoli particularly likes being planted next to potatoes for improved flavor (however, some websites note that the two prefer different soil pH – so try this combination yourself to see how it works!). Cauliflower also likes to be planted next to celery, because the strong scent of celery helps repel Brassica butterflies that can often destroy an entire cauliflower crop!
Carrots plant well with beans, Brassicas, chives, leeks, lettuce, onions, peppers, pole beans, radish, rosemary, sage, and tomatoes (quite the companion plant!). Avoid planting next to dill, parsnips and potatoes, though. Tomatoes will bring out the flavor in carrots, but your carrots might be smaller as tomatoes and carrots compete for soil nutrients.
Cherries love garlic just like apples and apricots (and for the same reasons). Garlic helps repel pests like the fruit tree bore, aphids and mites. The tree roots also absorb sulfur produced by the garlic, making the tree more resistant to fungus, mold and black spot. Marigolds also plant well with cherries, helping to attract pollinators.
Chives do great when planted next to tomatoes and carrots, as it helps bring out their flavors. Also works well when planted next to Brassicas. Chives repel aphids, carrot rust flies and Japanese beetles. They should not be planted next to beans and peas.
Cilantro repels aphids, potato beetles, and spider mites.
Corn is a companion to beans, beets, cucumber, dill, melons, parsley, peas, potato, squash and sunflower. It should not be planted next to celery or tomatoes. Amaranth can also be planted between corn rows to increase mulching (conserve soil moisture) and reduce weeds.
Cucumber loves to be planted next to asparagus, beans, Brassicas, celery, corn, dill, kohlrabi, lettuce, onion, peas, and radishes. They shouldn’t be planted next to potatoes or sage, however. Corn and sunflowers work like a trellis for cucumbers to attach on and grow upward. Dill will help cucumbers by attracting predatory insects, and nasturtiums improve the flavor and growth of cucumbers.
Dill improves the health of cabbages and other Brassicas like cauliflower and kale. It is a great companion for corn, cucumbers, lettuce and onions. Avoid planting next to carrots and tomatoes! Dill attracts ladybugs, parasitoid wasps, hoverflies, bees, and garden spiders (making it a very beneficial garden herb).
Eggplant is a good companion for amaranth, beans, marigolds, peas, peppers, spinach and thyme. Do not plant next to fennel!
Garlic is a great companion plant for roses to help repel aphids. It is high in sulfur, so it also helps get rid of pests like whiteflies, Japanese beetles, root maggots, carrot rust fly and other non-beneficial bugs. It is a great companion for beets, Brassicas, celery, fruit trees (like apricots, apples and cherries), lettuce, potatoes, strawberries, and tomatoes. Do not plant next to peas.
Lettuce like arugula, radicchio, green leaf lettuce, romaine, you name it, like to be planted next to beets, Brassicas, carrots, celery, chervil, cucumbers, dill, garlic, onions, radish, spinach, squash and strawberries.
Marigolds produce chemicals that repel whiteflies, Mexican bean beetles, root knot nematodes, and root lesion nematodes. They are great for planting around fruit trees, but should not be planted around beans.
Marjoram grows well next to all plants, and is believed to stimulate the growth of plants around it. Asparagus particularly loves asparagus. It is very attractive to bees and other pollinators, so it is great planted next to plants that need pollinating like cucumbers and squash.
Mint helps attract earthworms, overflies, and predatory wasps. It also repels cabbage moths, aphids, and flea beetles. Mint is invasive, so it is best planted on its own in containers around a garden. Do not plant near parsley.
Nasturtiums act as a great trap crop for aphids, and they also help get rid of whiteflies, cucumber beetles, squash beetles, Colorado potato beetles and Mexican bean beetles. It is a great companion flower for Brassicas, cucumbers, melons, radishes and tomatoes. They provide good cover for ground beetles and spiders, and help attract many different pollinators like bees and butterflies.
Onions love the herbs chamomile and summer savory to improve their flavor. They also work great alongside beets, Brassicas, carrots, dill, kohlrabi, leeks, lettuce, strawberries and tomatoes. Do not plant near asparagus or peas. Onions help repel the carrot rust fly, hence why they should be planted next to carrots.
Parsley likes to be grown next to asparagus, carrots, chives, corn, lettuce, onions and tomatoes. Allowing some parsley to go to bloom will help attract hoverflies and predatory wasps.
Parsnips are great when grown next to green peas, bush beans, peppers, tomatoes, lettuce, rosemary and sage. Some vegetables and herbs do not like parsnip, however, and that includes carrots, celery, dill and fennel.
Peas are wonderful companions for beans, carrots, celery, corn, cucumber, eggplant, parsley, parsnip, peppers, potatoes, radish, spinach, strawberries and tulips. Avoid planting next to onions.
Peppers make good companion plants for asparagus, basil, carrots, cucumbers, eggplant, endive, oregano, parsley, rosemary, squash, Swiss chard and tomatoes. Do not plant next to beans, Brassicas or fennel.
Potatoes like to be planted next to beets, bush beans, celery, corn, garlic, marigolds, onions, and peas. Avoid planting next to asparagus, cucumber, Kohlrabi, melons, parsnips, rutabaga, squash, sunflower and turnips.
Radishes make good neighbors for beans, beets, carrots, celeriac, chervil, cucumber, lettuce, mint, parsnip, peas, spinach, squash, and tomatoes. Avoid planting right next to potatoes. Planting radishes around your squashes will allow them to grow better and bloom, and will also prevent most pests of squash and cucumber.
Rosemary loves to be planted next to beans, Brassicas, spinach and carrots. Rosemary helps repel cabbage moths, Mexican bean beetles, and carrot rust flies.
Sage repels cabbage moths and carrot rust flies, and also helps improve the health of parsnips. Do not plant next to cucumbers, which dislike aromatic herbs.
Spinach is a great companion for Brassicas, eggplants, leeks, lettuce, peas, radishes and particularly strawberries. Do not plant near potatoes.
Squash doesn’t only love to be planted next to corn, but it also works great next to lettuce, melons, peas and radish. Avoid planting next to Brassicas or potatoes. Borage is said to improve the growth and flavor of squash. Marigolds and nasturtium help repel many different squash pests.
Strawberries respond well when coupled with beans, borage, garlic, lettuce, onions, peas, spinach and thyme. Avoid planting next to Brassicas, fennel and kohlrabi.
Sunflowers are said to increase corn yields when planted next to corn rows. Use sunflowers as a means to attract pollinators to other crops, particularly squash and pumpkins, and any other crop that requires pollinating insects.
Tomatoes are
sensitive when it comes to companion planting, but they mostly benefit
from asparagus, basil, beans, borage, carrots, celery, chives, collards,
garlic, lettuce, marigold, mint, nasturtium, onion, parsley and
peppers. Do not plant next to dill, Brassicas, corn or kohlrabi.
Potatoes may spread blight to tomatoes, so do not plant nearby. Tomatoes
aren’t the best of friends with cucumbers either, as they are both
require lots of resources in the soil. While some people have success
planting them together, others do not. Try to avoid planting them in the
same space.